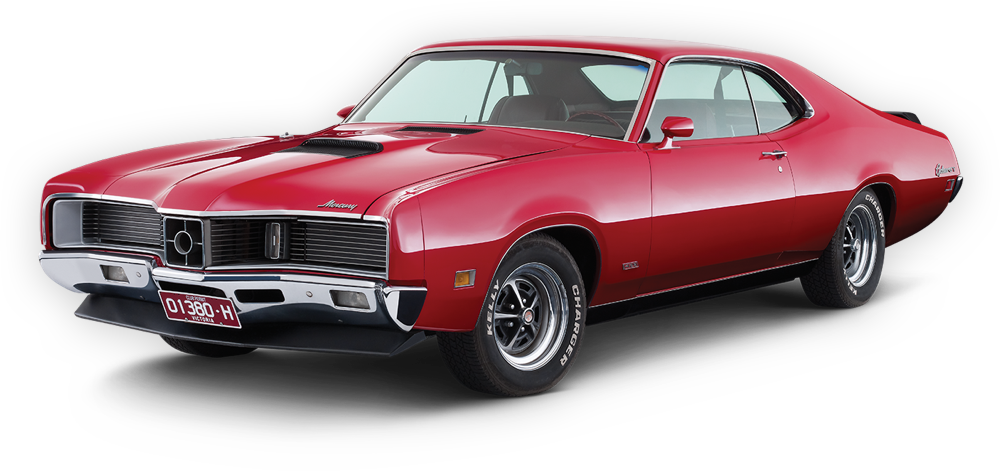

The Valiant Charger R/T E38 and R/T E49 Hemi Six Packs are rightly revered as the ultimate road registerable competition cars produced by Chrysler Australia during the factory-backed Series Production wars of the late 1960s and early ‘70s.
Even so, one of Chrysler’s top factory drivers at the time, Leo Geoghegan, maintains that the ultimate R/T (Road & Track) Valiant in his opinion would have been to slot the E49 Charger’s mechanicals into the body of its predecessor – the VG Pacer.
Leo worked closely with Chrysler engineers on both the Pacer and Charger R/T competition development programs. He spent countless days pushing them to breaking point around South Australia’s Mallala Raceway, so is amply qualified to make such an assessment.
Leo’s theory is based on simple physics. The chunky and handsome two-door Charger coupe was built on a relatively short 105-inch (2670mm) wheelbase, which magnified the ‘see-saw’ effect of dynamic weight transfer from front to rear resulting in excessive squat under acceleration and forward pitch under heavy braking.
The VG Pacer, however, was built on a longer 108-inch (2743mm) wheelbase which not only reduced these effects but also provided better straight-line stability and handling overall.
Leo’s proposed R/T E49 Hemi Pacer certainly would have been quite a weapon, with the E49’s 302 bhp, triple Weber-equipped, 265 cid Hemi six, four-speed gearbox and lightweight alloy wheels in a more stable platform that was about 90 kgs lighter.

Such a combination could never have been a production reality, given that the VG range was long out of production when the Charger R/T E49 was released.
However, Geoghegan’s hindsight theory does confirm that the Hemi Pacer was more than just a development mule for the R/T Charger program that followed. It was an outstanding performance package in its own right, with a 1970 Bathurst 500 class victory to prove it.
Indeed, the fact that it managed to give Holden’s LC Torana GTR XU-1 a run for its money on the race track serves to highlight what a brilliant budget-priced road and track performer the VG Hemi Pacer really was.
Given that the 3.0 litre triple-carbed Torana six was much smaller physically and around 280 kgs lighter, the Pacer relied on a combination of good handling and massive torque from its larger capacity Hemi six to compensate.
And with its race numbers removed and hubcaps replaced, it could still offer comfortable seating for up to five passengers and their luggage on the way home from the track, either local or interstate. The VG Hemi Pacer really defined how good a hot six cylinder-powered Aussie four-door sedan could be.

Birth of the Hemi Pacer
When the new VG Valiant range was launched in March 1970, the major talking point among performance enthusiasts and race teams was its new inline six cylinder ‘Hemi’ engine; so named because of the most marginal of hemispherical shapes in its combustion chambers.
With a cubic capacity of 245 cid (4.0 litres), the new six also featured a robust seven-bearing crankshaft and the latest in thin-wall casting techniques which made it 18 kgs lighter than the old 225 cid slant six it replaced.
Although Chrysler Australia was a smaller operation than Ford and GM-H, the VG Hemi Pacer showed the Adelaide-based company’s serious intent to mix it with the big boys on the race track, in an era when winning on Sunday translated to showroom sales on Monday.
The new 245 cid Hemi was initially available in two power grades – 165 bhp (123kW) with a single-barrel carburettor and a stronger 185 bhp (138kW) version with a two-barrel carb. This latter version laid the foundation for the even hotter VG Hemi Pacer launched in March 1970, which was claimed to have close to 200 bhp on tap.
Then in August 1970, some five months after the launch of the two-barrel Pacer, came an even more powerful version fitted with a big 400cfm Carter four-barrel carburettor on a six-branch manifold just in time for the Bathurst 500, which bumped the Hemi’s power output up to 211 bhp (157kW).
The four-barrel version was a late decision by Chrysler, built with a view to not only winning its class but also being in with a shot at outright honours on the Mountain if the cards fell their way.

Competition Options: Chrysler gets serious
Chrysler announced a series of factory options in 1970 to turn the base model two-barrel and four-barrel Pacers into nothing less than thinly disguised Bathurst race cars that could still be driven on the road.
This mirrored what arch rival Holden was doing with its new six cylinder LC Torana GTR by offering an ‘XU-1’ Bathurst package and Ford with its ‘HO’ upgrade for the XW Falcon GT. All you had to do was tick the right box on the order form.
VG Hemi Pacers equipped with either the ‘E31 Two-Barrel Track Pack’ or ‘E34 Four-Barrel Track Pack’ came loaded with numerous modifications to engine, transmission and chassis to improve performance and durability under the stress of competition.
Although the four-barrel version was developed primarily to chase GT-HOs at Bathurst, it was all done in a hurry and was fundamentally flawed due a dreadful flat-spot caused by fuel surge in the carburettor float bowls.
Unfortunately, this flat-spot always occurred under high g loadings in the middle of corners, at the precise time when drivers needed sharp throttle response. Attempts were made to cure the problem with internal baffles but the flat-spot remained.
Also available were a choice of diff ratios and the option of power-boosted brakes, because Chrysler’s track testing had shown that it was too easy to lock brakes at race speeds with the booster fitted due mainly to insufficient pedal feel.

For really serious Hemi Pacer racers, there were two more high performance options available only to those who had already ordered the E31 or E34 Track Packs.
The ‘A84 Competition Pack’ included track-only upgrades of suspension hardware and brake cooling, plus a close-ratio version of the three-speed manual gearbox. This came with a stronger tail-shaft to withstand the expected abuse off the start line.
Again, this was a compromise demanded by Chrysler Australia’s commitment to producing cars with almost 100 per cent local content. As there was no Australian-made four-speed gearbox available at the time, Chrysler’s only option was Borg Warner’s three-speed unit.
The much taller first gear in the close-ratio version was designed to sit about midway between first and second in a four-speed gearbox. This proved to be a real handicap against the GT-HOs and XU-1s in short five and ten-lap sprint races, where Pacer drivers would struggle to get off the start line quickly.
However, this was no major handicap at Bathurst and in other long distance races, because apart from leaving the start line, drivers with four-speed gearboxes never used first gear.

E31 and E34 Pacers equipped with the A84 Competition Pack needed to tick one more box on the factory options list if they were serious about chasing a victory at Bathurst.
This was option ‘J42’ – a huge 35-gallon (159-litre) fuel tank mounted in the boot directly above the rear axle with a flip-top fuel filler cap mounted on top of the left rear quarter panel. This elegant cast-aluminium cap is one of the best features on a Hemi Pacer.
Chrysler calculated that with the two-barrel Hemi’s fuel economy of about 8.0 mpg or 280 miles per tank, this huge fuel load could get a Pacer through 500 miles (800 kms) at Bathurst with only one fuel stop. It was thought this would provide a crucial advantage over its main competitor in Class C, the Torana XU-1, which had a much smaller 17-gallon fuel tank.
The four-barrel Pacer was also expected to have superior fuel economy to that of the new Phase II GT-HO Falcons, which were equipped with even larger 36-gallon tanks but could manage only about 5.0 mpg from their big breathing 5.8 litre V8s, requiring at least two stops for fuel.
The Pacer’s gigantic long-range tank made a tight fit between the boot hinges, held firmly in place by thick steel straps that bolted through the boot floor.
Testing by Chrysler engineers at Mallala, using sand bags to simulate the weight of a full tank of fuel in different locations, determined that the best position was directly over the rear axle. This provided good traction when full, but also raised the car’s centre of gravity somewhat.
Not that they really had much choice because the car still needed to have a useable boot space. It was, after all, a four door ‘production’ sedan designed for road use. Chrysler went as far as they could within numerous limitations.

Class Warfare: The 1970 Hardie-Ferodo 500
Series Production racing at Bathurst was at its peak during this era, with genuine factory teams from Ford, GM-H, Chrysler, Datsun and Toyota all taking part.
With its E31/A84/J42 two barrel Pacer, Chrysler had both barrels aimed at victory in Class C for cars with a retail cost between $2,401-$3,150 where it would compete directly with Holden’s new Torana XU-1.
With its E34/A84/J42-equipped four-barrel Pacer, Chrysler would have Class D ($3,151-4,100) pretty much to itself, but with its greater power was considered a high-odds shot at outright victory if the new Phase II Falcon GT-HOs and XU-1s were to strike trouble.
A three-way fight for line honours was expected between Ford, Holden and Chrysler after the Sandown Three-Hour race held a few weeks prior to Bathurst resulted in the new GT-HO (Allan Moffat), Torana XU-1 (Colin Bond) and four-barrel Pacer (Norm Beechey) finishing in that order.
On raw speed alone nothing could touch the GT-HOs, but the new ‘Cleveland’ V8 engine had been suffering some chronic reliability problems which it was thought could play right into the hands of Ford’s less powerful but more economical Torana and Pacer competition.
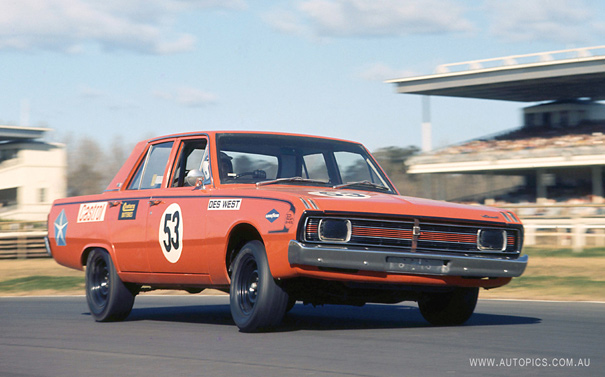
A quartet of four-barrel Pacers was entered for Class D with works entries for Des West/Peter Brown and a bright yellow Shell-backed car for Norm Beechey/Bruce Hindhaugh, plus Joe Butta/Bob Genders and Alan Cant/Bob Cook.

Class C was packed with Torana XU-1s, including three HDT works cars. Against this Holden onslaught, Chrysler entered two factory prepared two-barrel Pacers for Leo Geoghegan/Nick Ledingham and Doug Chivas/Graham Ryan.
As expected, Ford works driver Moffat nailed down pole position in practice when he sucked the doors off his competition with a dazzling 2 min 49.3 secs lap.
By stark comparison, Des West in the quickest of the four-barrel Pacers may have been the fastest in Class D but only 11th on the starting grid with a practice time of 2 min 56 secs - more than six seconds adrift of Moffat’s best. West would have his work cut out.
The works-entered two-barrel Pacers were outpaced by several of the new Torana XU-1s in Class C, with Geoghegan the quickest at 2 min 59.8 secs compared to Colin Bond’s HDT entry on 2 min 54 secs.
Potential winning advantages for the Pacers were their proven reliability and long fuel range, against Falcon GT-HOs and Torana XU-1s which were comparatively new with less track time under their treads.
As expected, many of the new Falcons and Toranas were struck down with a myriad of mechanical problems in the race. Unfortunately, that casualty list included two of the four-barrel Pacers - Butta/Genders with bent valves and timing gear failure and the highly fancied Beechey/Hindhaugh Shell entry with a similar problem.

Even so, West/Brown took control of Class D from the start, with West actually leading the race outright at one stage due to an overlap following the first round of pit stops. As expected, this was due to his car’s huge fuel tank and superior six cylinder economy.
However, according to West the four-barrel Hemi engine was a thirsty beast. His petrol cap was also leaking which resulted in an unexpected and time-consuming stop for more fuel late in the race. That stop dropped him from fifth place to an eventual seventh place outright and three laps behind the Moffat’s winning GT-HO.
And even though West/Brown crushed Class D to win by six laps, they still finished two laps behind the pair of two-barrel factory Pacers that engaged in a fierce day-long battle with the Torana XU-1s for Class C that came agonisingly close to a class win and outright podium finish for Chrysler.

With one lap remaining, Doug Chivas had just retaken the class lead from Torana privateer Don Holland only to suffer the agonising bad luck of a blown rear tyre at the end of Conrod Straight that sent him up the escape road.
Holland passed him and completed the final lap to win Class C and claim third outright for the new XU-1 a lap behind the works GT-HOs. Chivas pitted quickly for a new tyre and still finished second in class and fourth outright, ahead of the Geoghegan/Ledingham team car.
With the all-new VH Charger R/T E38 waiting in the wings for 1971, the 1970 Hardie-Ferodo 500 was the Hemi Pacer’s first and last factory-backed Bathurst campaign. And given Chrysler’s limited resources, it was a most impressive one at that.